Saturday, July 7, 2012
jelly cheesecake
But after shifting house and moving away from that area, I seldom go back. So when this recipe came out in the Straits Times, I simply had to try!
Jelly Cheesecake
9 McVitie's Original Digestive biscuits
70g butter, melted
250g cream cheese (room temperature, I used low fat)
295g condensed milk (I cut down to 2/3)
juice of 1 lemon
2 tsp gelatin
50ml hot water
strawberries for decoration (optional)
One 90g lime-flavoured jelly crystals (I used Tortally brand, as recommended in the newspaper recipe)
1. Crush the biscuits, they should resemble fine bread crumbs. (I put mine in a clean plastic bag and crushed using hand)
2. Put the biscuit crumbs in a bowl, add the butter and mix well.
3. Pour the biscuit mixture into a 8-inch round or square baking tin. Press the mixture and pat down firmly.
4. Chill the mixture in the fridge for at least an hour.
5. Using an electric mixer, beat cream cheese until it is smooth.
6. Add condense milk and lemon juice. Continue to mix.
7. Dissolve the gelatin in the hot water. Strain it if there are insoluble granules. Add to cream cheese mixture and mix well.
8. Pour the cream cheese mixture into the baking tin and spread evenly.
9. Bisect the strawberries, cut out the stalk and trim if necessary.
10. Arrange the strawberries on the cream cheese mixture according to pattern desired. Gently push them into the cream cheese mixture slightly, deep enough to ensure that they will not slide.
11. Leave in the fridge to refrigerate overnight.
12. Follow the instruction on the jelly crystals box to make the jelly solution. Let it cool to room temperature.
13. Pour the jelly mixture until it covers the strawberries (or more if desired)
14. Put the tin back into the fridge to refrigerate until the jelly has set.
Recipe adapted from Jelly Hearts recipe published in the Straits Times (I didn't record the date)
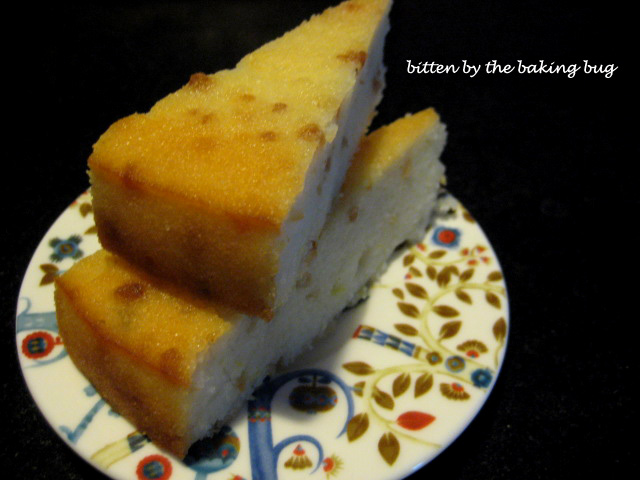
The cheesecake tasted exactly how I remembered it to be: delicious, refreshing, and with interesting contrasting texture.
The bakery's version is plainer, without the strawberries. But I find that the strawberries complemented the jelly and the cheesecake well and they looked so pretty set in the jelly. I should have used more for a more elaborate pattern.
For those that experienced the jelly cheesecake for the first time (like my hubby and mum), after getting through the initial shock of the striking green colour, they actually like the cheesecake, esp my mum.
Thursday, June 14, 2012
Earl grey tea cake with lemon syrup
Last weekend, I finally got down to try experimenting with it. It went a slightly more winded route than I originally planned...
When I was making the cake batter, I felt something was amiss but couldn't make out what was it. The moment I mixed everything together in the final step, put baking pan into the oven and close the oven door, it struck me: I forgot the sugar!!
Too late to do anything but in order to salvage my effort, I thought glazing may be the answer if the cake batter can hold it's shape. So I frantically searched the Internet for glazing recipe that goes well with Earl Grey tea cake while the cake was baking in the oven.
Having found quite a few recommendations that lemon syrup compliments Earl grey tea cake, I set out to work, my heart wishing hard that the cake will not collapse or be too tough since it lacks sugar to hold the structure. According to Ask The Experts, sugar plays multiple roles in the science of baking.
In the mean time, from the window of the oven, I can see that the cake has risen well but that doesn't guarantee it will not collapse after being taken out from oven. When the baking time was up and toothpick inserted confirmed it was done, I took the cake out and poured all the syrup on the cake. 30 mins later and realizing that the cake was still holding strong, with all the syrup absorbed, my heart jumped with joy...
But wait, how about the taste?? Slicing one slice for myself, I almost couldn't believe that it was simply awesome! It was soft, fluffy and moist, with just enough sweetness and lots of flavours. Seriously, I think it was the most memorable cake I ever made, mainly bcoz I was expecting it to fail.
Too bad that the cranberries and chocolate chips all sank to the bottom, I should have floured them slightly, but the overall taste was good. As for the Earl grey taste, it was really mild. The next time I make it again, I will either increase the tea leaves amount or cut down on the cranberries, since I find it overpowering the tea taste.
So cake without sugar?? Not that I will go down that route often, but maybe for this recipe, I will try again :)
Earl Grey Tea Cake with Lemon Syrup
2 Earl Grey tea bags
1/4 cup boiling water
1/3 cup milk
100g unsalted butter, room temperature
2 eggs
2/3 cup caster sugar (totally missed out in my case)
1 1/4 cups self-raising flour (I use cake flour + 1 tsp salt + 1 tsp baking powder)
1 cup cranberries (optional)
1/4 cup chocolate chips
juice of 1 lemon
zest of 1 lemon
3 tbsp icing sugar
1. Preheat oven to 180 degree C, grease pan.
2. Empty tea leaves from tea bags into a cup and add the boiling water.
3. Set aside for 3-5 mins
4. Stir in the milk and transfer to a mixing bowl
5. Add the butter, sugar, eggs and flour.
6. Use electric beater on low to beat until just combined.
7. Increase the speed to medium and beat until mixture is pale and creamy (may look slightly curdled)
8. Bake in a preheated oven for 20-22 mins or until toothpick inserted comes out clean
9. While cake is baking, add the juice, zest and icing sugar in a bowl.
10. Mix until the sugar fully dissolved.
11. Pour the lemon syrup onto the cake once it's out of the oven
12. Wait until syrup fully absorbed by the cake before turing the cake out from the pan
recipe adapted from nigella lawson's community recipe and flick your food for the lemon syrup.
Since I have done the cake without the sugar, I am not too sure if the cake will be too sweet if full sugar amount is used. Unless if you have a really sweet tooth, I would recommend cutting down the 2/3 cup of sugar to maybe 1/2 or even 1/4 cup. And if you really have moderate capacity for sweetness like me (I like my dessert/cake/muffin mildly sweet but full of flavours), you may even try omitting the sugar? Well, part of the fun of baking is experimenting to suit your own taste right?
Monday, April 30, 2012
layered mini cheesecakes
Layered Mini Cheesecakes
1/2 cup graham cracker crumbs (I used digestive biscuits)
2 tbsp white sugar
2 tbsp butter or margarine (I used butter)
1 (8 ounce) package cream cheese, softened
1/4 cup white sugar
1 1/2 tsp orange juice
1/2 tsp grated orange zest
1/4 tsp vanilla extract
fruity preserve or jam of choice (optional)
1. Preheat oven to 165 degree C. Line muffin pan.
2. In a medium bowl, mix together the cracker crumbs, sugar and margarine with a fork until combined. Measure a rounded teaspoon of the mixture into the bottom or the muffin cup, pressing firmly. Bake in the pre-heated oven for 5 minuted, then remove to cool. Keep the oven on.
3. Beat together the cream cheese, sugar, juice, zest and vanilla until fluffy. Mix in the egg.
4. Pour the cream cheese mixture into 6 of the muffin cups, filling about 1/2 full. Transfer the crusts from the other 6 unfilled cups into the filled ones. Top up with the remaining cream cheese mixture. Bake at 165 degree C for 25 mins. Cool completely in pan before removing. Refrigerate until ready to serve.
5. Top with preserve or jam of choice before serving.
Recipe adapted from allrecipes.
One great thing about these mini cheesecakes is the controllable portion. Seriously, how many of us, urban cubicle dwellers with hardly any weekly exercise, will ever whoop down a giant piece of cheesecake without feeling a single ounce of guilt?
Another great thing, they are absolutely tasty and so easy to make. I am the sort of baker that will be happy to try any interesting recipe as long as it does not take up too much of my free time. My baking philosophy is always - simple, tasty and sustainable (to let me have to energy to keep on baking), period :).
Oh, these cheesecakes actually have a small indent on them after being baked, which will hold the preserve/jam topping nicely as well.
One complain I have of them is that the crust crumbles ever so easily... I tried to google whether there is any solution to it, some people suggested chilling the base. Well, maybe next time I will try it.
I am submitting this post to Aspiring Bakers #18 Layers of Love (April 2012) hosted by Sam of Sweet Samsations.
Thursday, March 8, 2012
coffee swirl yogurt cake
Tuesday, January 31, 2012
citrusy yogurt semolina cake
Tuesday, September 6, 2011
light lemon cheese cake
Tuesday, July 12, 2011
egg yolk sponge cake
green tea tofu cake
Ingredients:
2 1/2tsp green tea powder
1 cup tofu (soft)
1 egg
3 tbsp butter, melted
1/4 cup brown sugar
1 cup pancake mix
Instructions:
1. Preheat oven to 350F.
2. Sift together pancake mix and green tea powder. Set aside.
3. Drain water from the tofu package.
4. In a bowl, whip tofu until smooth with a blender or food processor.
5. Beat in egg, butter and sugar.
6. Add the flour mixture (pancake mix and green tea powder), mix thoroughly.
7. Pour batter into a loaf pan, and bake about 30min.
For the tofu, I used normal silken tofu (for steaming) available at local supermarket. The cake tasted moist, supple and quite fragrant but the texture was slightly on the dense side and more pancake-like (which is understandable since pancake mixture was used). The bakery bought version was much lighter and more fluffy. So while the 4 of us finished the whole cake, I still prefer the lighter and fluffier version.
So that night, I tried searching on Chinese language websites instead and found a couple of different versions. Maybe I will give them a try in future.